12 junho 2025

canon 350D firmware 1.02 better lens focus firmware (1.03 firmware have worst lens focus)


canon 350D firmware 1.02 better lens focus firmware (1.03 firmware have worst lens focus)


link for the file

https://drive.google.com/file/d/1YBkUleCCCcJ__vTO1jZXF_RXEq-HOuA9/view?usp=sharing


save the file on memory card in last option on menu with says firmware version you click ok and the camera does the firmware update

22 abril 2025

strain gauge block cr10 smart fix your leveling on your cr10 smart


English

Tired of trying to level up your CR10 Smart and never getting it right? Then with this upgrade you will achieve that…. But first you have to check how the nozzle moves up and down... with the machine stopped and not heating... with the hotend in an elevated position... open the cover behind the X-axis motor and push the CR10 Smart hotend up with your finger. If a blue light flashes, it means it is reading correctly... sometimes when the hotend screws are too tight, the hotend always has the light on... we want this light to come on easily with a light touch... you will have to make sure that there will be nothing "holding" the hotend in place... and when you close the hotend cover... make sure that the wiring will pass through the front of the hotend just above the cooling system... and never on top of the hotend... because the wires being on top prevent the leveling system from moving freely... after making sure of this, tighten the 3 screws on the hotend cover... they are crucial to keeping it aligned.
Note: Whenever you are going to make a new print, make sure that there is no filament left in the nozzle because even the slightest bit of filament will affect the leveling... because the nozzle touches the table "cold" and that is why there is always a different random reading on the cr10 smart and others that use this method with strain gauge.


-----------------------------------------------------

(portuguese)

cansado de tentar ficar nivelando a sua cr10 smart e nunca ficar correto? então com esse upgrade voce vai conseguir isso…. mas primeiro você tem que verificar como esta o movimento do bico para cima e para baixo… com a maquina parada e sem aquecer… com o hotend numa posição elevada… abra a tampinha que fica atras do motor do eixo X e empurre com o dedo para cima o hotend da cr10 smart se piscar uma luz azul é q esta lendo corretamente…  as vezes quando os parafusos do hotend estão muito apertados o hotend fica sempre com a luz acesa… queremos q essa luz acenda facilmente com o um leve toque… você vai ter que se certificar q não vai ter nada “prendendo” o hotend no lugar… e quando for fechar a capa do hotend… se certifique que a fiação vai passar pela frente do hotend logo acima do sistema de resfriamento… e nunca na parte de cima do hotend… pois os fios ficando em cima previne do sistema de nivelamento mover livremente…  apos se certificar disso prenda os 3 parafusos da capinha do hotend…. eles são cruciais para manter ele alinhado


obs. sempre quando for fazer uma nova impressão certifique-se q não tem nenhum resto de filamento no bico pois aquele resto o minimo que seja vai afetar o nivelamento… pois o bico da um toque na mesa “frio” e por isso  q sempre tem uma leitura aleatória diferente na cr10 smart e outras q usam esse metodo com strain gauge 


link para o arquivo: https://www.printables.com/model/1273397-strain-gauge-block-cr10-smart-fix-your-leveling-on

17 abril 2025

how to print better with cr10 smart with little upgrades and a gcode tweak on cura (Como imprimir melhor com o CR10 Smart com pequenas atualizações e um ajuste no Gcode no Cura)


(english)

how to print better with cr10 smart with little upgrades and a gcode tweak on cura


upgrade to pei sheet... the prints now print to much better...
and i use a blue cheap metal extruder from aliexpress only you need to recalculate your e-steps (have a good video on youtube to calibrate e-estpes no cr10 smart)


and i use this start gcode on cura (use cr10s pro profile)
----------------------------------------------------------------------------------

M201 X500.00 Y500.00 Z100.00 E5000.00 ; Setup machine max acceleration

M203 X500.00 Y500.00 Z10.00 E50.00 ; Setup machine max feedrate

M204 P500.00 R1000.00 T500.00 ; Setup Print/Retract/Travel acceleration

M205 X8.00 Y8.00 Z0.40 E5.00 ; Setup Jerk

M220 S100 ; Reset Feedrate

M221 S100 ; Reset Flowrate


M140 S{material_bed_temperature_layer_0} ; Iniciar aquecimento da mesa

M190 S{material_bed_temperature_layer_0} ; Aguardar a mesa atingir a temperatura


G28 ; Home (X, Y, Z)


M420 S1 ; Habilitar nivelamento da malha


G1 X5 Y5 Z10 F5000 ; Levar o bico para um canto e subir um pouco


M104 S{material_print_temperature_layer_0} ; Iniciar aquecimento do bico

M109 S{material_print_temperature_layer_0} ; Aguardar o bico atingir a temperatura


G92 E0 ; Reset Extruder

G1 Z2.0 F3000 ; Move Z Axis up

G1 X10.1 Y20 Z0.28 F5000.0 ; Move to start position

G1 X10.1 Y200.0 Z0.28 F1500.0 E15 ; Draw the first line

G1 X10.4 Y200.0 Z0.28 F5000.0 ; Move to side a little

G1 X10.4 Y20 Z0.28 F1500.0 E30 ; Draw the second line

G92 E0 ; Reset Extruder

G1 Z2.0 F3000 ; Move Z Axis up

--------------------------------------------------------------------------------------------------


the nozzle does a little bump and wait in the corner to the bed heat... after that the nozzle heats up and start the print....


--------------------------------------------------------------------------------------------------

and the secret end gcode

G91 ; Modo de posicionamento relativo

G1 E-6 F2400 ; Retração maior do filamento (6 mm)

G1 Z0.2 F2400 ; Sobe um pouco o bico para evitar marcas na peça

G1 X5 Y5 F3000 ; Move o bico um pouco para o lado (wipe out)

G1 Z10 ; Sobe o bico mais um pouco para segurança


G90 ; Volta para posicionamento absoluto

G1 X0 Y{machine_depth} ; Move o bico para a frente da mesa (apresentar a peça)


M107 ; Desliga o ventilador de peça

M104 S0 ; Desliga o aquecimento do hotend

M140 S0 ; Desliga o aquecimento da mesa

M84 ; Libera todos os motores


G4 S120 ; Aguarda 120 segundos (2 minutos) para resfriamento passivo

-------------------------------------------------------------------------------------------------


M81 ; Desliga a impressora (se suportado pelo firmware e hardware)

at end of print , the printer retract the filament a little more to clean the nozzle of any filament... and a m81 command to shutdown the printer after 3 minutes of cooldown


now finally the print prints much better.... and you need a good filament dryer helps alot if live in area with much humidity (portuguese)


Como imprimir melhor com o CR10 Smart com pequenas atualizações e um ajuste no Gcode no Cura Atualizei para a folha PEI... as impressões agora estão muito melhores... E eu uso uma extrusora de metal azul barata do Aliexpress, só que você precisa recalcular seus e-steps (tem um bom vídeo no YouTube para calibrar e-steps no CR10 Smart). E eu uso este Gcode inicial no Cura (Eu usei o profile da cr10 s pro no cura) ---------------------------------------------------------------------------------- M201 X500,00 Y500,00 Z100,00 E5000,00; Configurar aceleração máxima da máquina M203 X500,00 Y500,00 Z10,00 E50,00; Configurar taxa de avanço máxima da máquina M204 P500,00 R1000,00 T500,00; Configurar aceleração de impressão/retração/deslocamento M205 X8,00 Y8,00 Z0,40 E5,00 ; Configuração idiota M220 S100; Redefinir taxa de avanço M221 S100; Redefinir vazão M140 S{material_bed_temperature_layer_0} ; Iniciar aquecimento da mesa M190 S{material_bed_temperature_layer_0} ; Aguardar a mesa atingir a temperatura G28; Início (X, Y, Z) M420S1; Habilitar nivelamento da malha G1 X5 Y5 Z10 F5000; Levar o bico para um canto e subir um pouco M104 S{material_print_temperature_layer_0} ; Iniciar aquecimento do bico M109 S{material_print_temperature_layer_0} ; Manter o bico atingir a temperatura G92 E0 ; Reiniciar Extrusora G1 Z2.0 F3000 ; Mover o eixo Z para cima G1 X10.1 Y20 Z0.28 F5000.0 ; Mover para a posição inicial G1 X10.1 Y200.0 Z0.28 F1500.0 E15 ; Desenhar a primeira linha G1 X10.4 Y200.0 Z0.28 F5000.0 ; Mover um pouco para o lado G1 X10.4 Y20 Z0.28 F1500.0 E30 ; Desenhar a segunda linha G92 E0 ; Reiniciar Extrusora G1 Z2.0 F3000 ; Mova o eixo Z para cima -------------------------------------------------------------------------------------------------- o bico dá uma pequena pancada e espera no canto a cama esquentar... depois disso o bico esquenta e inicia a impressão.... -------------------------------------------------------------------------------------------------- e o gcode final secreto G91; Modo de posicionamento relativo G1 E-6 F2400; Retração maior do filamento (6 mm) G1 Z0.2 F2400; Sobe um pouco o bico para evitar marcas na peça G1 X5 Y5 F3000; Move o bico um pouco para o lado (wipe out) G1Z10; Sobe o bico mais um pouco para segurança G90; Volta para posicionamento absoluto G1 X0 Y{profundidade_máquina} ; Mover o bico para a frente da mesa (apresentar a peça) M107; Desligue o ventilador da peça M104S0; Desligue o aquecimento do hotend M140S0; Desliga o aquecimento da mesa M84; Libera todos os motores G4S120; Aguarda 120 segundos (2 minutos) para pagar passivo -------------------------------------------------------------------------------------------- M81; Desliga a impressora (é suportado pelo firmware e hardware) no final da impressão, a impressora retrai o filamento um pouco mais para limpar o bocal de qualquer filamento... e um comando m81 para desligar a impressora após 3 minutos de resfriamento agora finalmente a impressão fica muito melhor.... e você precisa de um bom secador de filamento ajuda muito se morar em área com muita umidade

02 abril 2025

gcode command to heat the print bed and then heat the hotend on the cr10 smart / comando gcode para aquecer a mesa de impressão e apos isso aquecer o hotend na cr10 smart


Frapê the cat - miss you... 


english


gcode command to heat the print bed and then heat the hotend on the cr10 smart


This gcode is for the Cura slicer, I'm using the CR10S Pro profile (the only profile that saves the bed mesh)


With this gcode, it's possible to heat the print bed, home the hotend and then heat it like this to prevent the nozzle from dirtying the bed with filament.


Start gcode

M201 X500.00 Y500.00 Z100.00 E5000.00 ; Setup machine max acceleration

M203 X500.00 Y500.00 Z10.00 E50.00 ; Setup machine max feedrate

M204 P500.00 R1000.00 T500.00 ; Setup Print/Retract/Travel acceleration

M205 X8.00 Y8.00 Z0.40 E5.00 ; Setup Jerk

M220 S100 ; Reset Feedrate

M221 S100 ; Reset Flowrate


M140 S{material_bed_temperature_layer_0} ; Iniciar aquecimento da mesa

M190 S{material_bed_temperature_layer_0} ; Aguardar a mesa atingir a temperatura


G28 ; Home (X, Y, Z)


M420 S1 ; Habilitar nivelamento da malha


G1 X5 Y5 Z10 F5000 ; Levar o bico para um canto e subir um pouco


M104 S{material_print_temperature_layer_0} ; Iniciar aquecimento do bico

M109 S{material_print_temperature_layer_0} ; Aguardar o bico atingir a temperatura


G92 E0 ; Reset Extruder

G1 Z2.0 F3000 ; Move Z Axis up

G1 X10.1 Y20 Z0.28 F5000.0 ; Move to start position

G1 X10.1 Y200.0 Z0.28 F1500.0 E15 ; Draw the first line

G1 X10.4 Y200.0 Z0.28 F5000.0 ; Move to side a little

G1 X10.4 Y20 Z0.28 F1500.0 E30 ; Draw the second line

G92 E0 ; Reset Extruder

G1 Z2.0 F3000 ; Move Z Axis up


Portugues

comando gcode para aquecer a mesa de impressão e apos isso aquecer o hotend na cr10 smart

Este gcode é para o fatiador Cura, estou usando o perfil CR10S Pro (o único perfil que salva a malha da cama)


Com este gcode, é possível aquecer a cama de impressão, colocar o hotend em casa e então aquecê-lo assim para evitar que o bico suje a cama com filamento.


Start gcode

M201 X500.00 Y500.00 Z100.00 E5000.00 ; Setup machine max acceleration

M203 X500.00 Y500.00 Z10.00 E50.00 ; Setup machine max feedrate

M204 P500.00 R1000.00 T500.00 ; Setup Print/Retract/Travel acceleration

M205 X8.00 Y8.00 Z0.40 E5.00 ; Setup Jerk

M220 S100 ; Reset Feedrate

M221 S100 ; Reset Flowrate


M140 S{material_bed_temperature_layer_0} ; Iniciar aquecimento da mesa

M190 S{material_bed_temperature_layer_0} ; Aguardar a mesa atingir a temperatura


G28 ; Home (X, Y, Z)


M420 S1 ; Habilitar nivelamento da malha


G1 X5 Y5 Z10 F5000 ; Levar o bico para um canto e subir um pouco


M104 S{material_print_temperature_layer_0} ; Iniciar aquecimento do bico

M109 S{material_print_temperature_layer_0} ; Aguardar o bico atingir a temperatura


G92 E0 ; Reset Extruder

G1 Z2.0 F3000 ; Move Z Axis up

G1 X10.1 Y20 Z0.28 F5000.0 ; Move to start position

G1 X10.1 Y200.0 Z0.28 F1500.0 E15 ; Draw the first line

G1 X10.4 Y200.0 Z0.28 F5000.0 ; Move to side a little

G1 X10.4 Y20 Z0.28 F1500.0 E30 ; Draw the second line

G92 E0 ; Reset Extruder

G1 Z2.0 F3000 ; Move Z Axis up


16 janeiro 2025

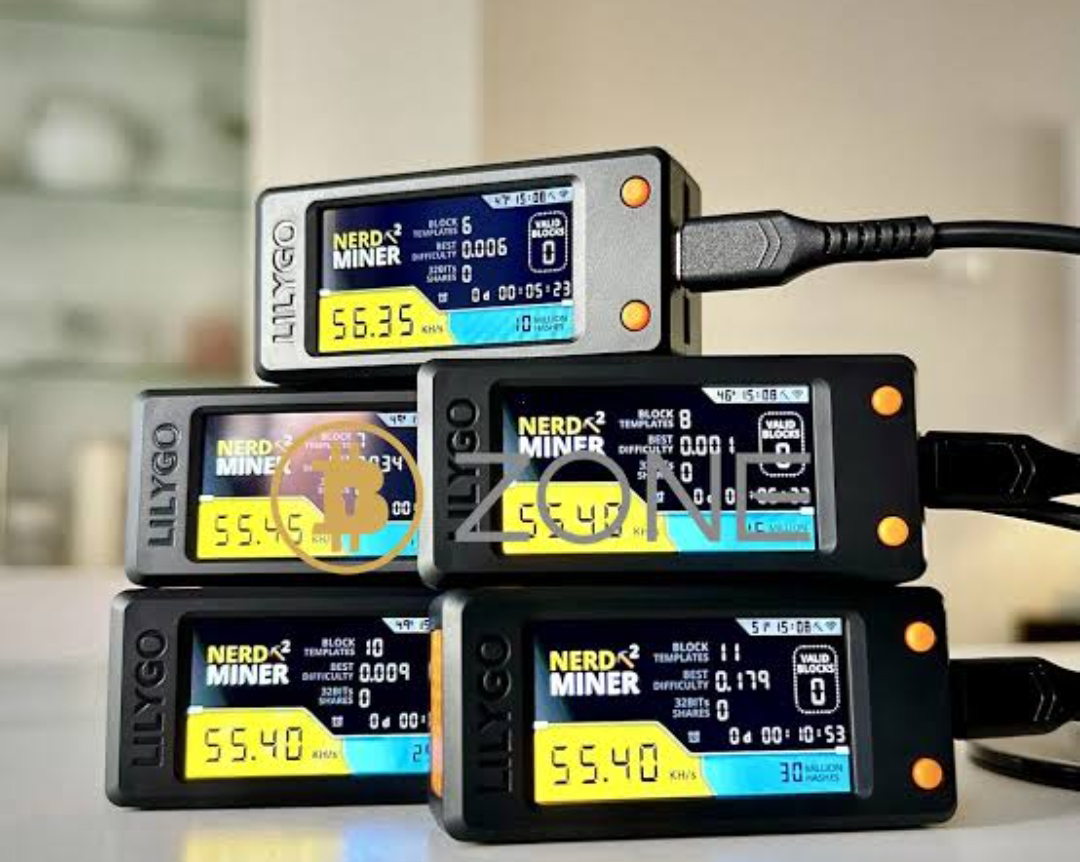
Nerdminer pools (esp32 miner)


English

you can mine in several different pools with nerdminer, here are some 

Bitcoin cash (bch) pool (lottery miner)

https://pool.bchsolo.com/
pool configuration

url: pool.bchsolo.com:
Port: 3333

and your bch wallet address


Portuguese:

voce pode minerar em varias pools diferentes com o nerdminer, segue algumas 


pool de Bitocoin cash (bch) (lottery miner)

https://pool.bchsolo.com/


configuração da pool

url:  

pool.bchsolo.com:
Port: 3333

e o endereço da sua carteira bch