14 março 2022

libre pilot installer cc3d and others and openpilot for drone controller (old)


 tried to search for open pilot and librepilot at official site but the links are offline 


here is the download link for the applications


in the download link have libre pilot installer, openpilot installer and cc3d original firmware

downoad link https://drive.google.com/drive/folders/1rJWpt_Ltmj9zVvZVNbyUy_n9XnvLbvCY?usp=sharing


31 dezembro 2020

anet a8 plus to use bowden extruder and all metal hotend on cura gcode ate end to prevent clogs

the command to use a bowden extruder on anet a8 plus at end gcode (end of printing to prevent clogs)

on all metal extruder

the command line in blue in this screen 


or copy this command line


M104 S0

M140 S0

G92

G1 F2000

G28 X0 Y0


17 setembro 2020

mp7 airsoft tappet plate repair 3d print (aep version ) Skorpion, mac10, uzi and others aeps that use the same tappet plate

if anyone need a tappet plate to mp7, mac10, skorpion aep i made a remix on a model in thingiverse that works fine now tested now 3 mags i printed in petg but i recommend to use nylon and two little metal nails 


(to put in tappet you need to heat the nail) the heat nail prevent the tappet 3d print to delaminate


mp7 with little tab print in this orientation and glue the the tab at correct angle


print with 100% infil only petg or nylon (abs is not strong )

Portuguese


se alguem precisar de uma tappet plate para mp7, mac10, skorpion aep fiz um remix de um modelo do thingiverse que funciona bem, testei agora 3 mags imprimi em petg mas recomendo usar nylon e dois pregos de metal bem pequenos ou arame

(para colocar no tappet você precisa aquecer o prego) o prego de aquecimento evita que o tappet impressão 3d delamine tem uma pequena peça que esta separada que deve ser colada junto no angulo correto imprimir com 100% infil apenas petg ou nylon (abs não é forte)

in detail the metal pins  
portuguese: no detalhe os pinos de metal


link to file  / link para o arquivo

https://www.thingiverse.com/thing:4599770

13 abril 2020

ezt t1, sinis t1 e similares ajuste da heatbed / heatbed new ajustment type

esquema para deixar a mesa de ezt t1 sinis t1 etc sempre corretamente ajustada de forma facil
voce vai precisar de um parafuso mais longo que o original de preferencia atravesse a parte de acrílico, cada base de fixação vai usar 2 porcas uma para comprimir contra a heatbed, para ficar bem presa o parafuso nao pode se mover,
abaixo dele a mola uma peça em 3d (ajuste de heatbed de impressora cartesiana que tem um espaço para colocar uma porca) abaixo disso voce precisa de uma peça colada abaixo da base de acrilico para o parafuso correr livremente (essa peça serve para o parafuso não ficar inclinando caso o buraco no acrilico seja maior)


english


heatbed of ezt t1 sinis t1 etc always adjusted correctly in an easy way


you will need a screw longer than the original preferably through the acrylic part, each fixing base will use 2 nuts one to compress against the heatbed, to be firmly attached the screw cannot move, below it the spring a piece in 3d (heatbed adjustment of Cartesian printer that has a space to put a nut) below that you need a piece glued below the acrylic base for the screw to run freely (this piece is for the screw not tilting if the hole in the acrylic is bigger)
a parte impressa em 3d é esta / the 3d printed part
https://www.thingiverse.com/thing:2167122https://www.thingiverse.com/thing:2167122
use the spacer of this archive below the acrilic base (glued)

04 setembro 2019

3d printer EZT t1 delta Config cura 3d / Configurações impressora 3d


trouble printing on small areas on cura 3d
(English)
for those who are having trouble printing small details on ezt t1 especially with abs (I don't know if that happens with pla) in areas with small details apparently extrusion is low ... but it seems like a slicer mistake saw about it in reddit just change the way the slicer fills the top and the bottom layer and a bonus z hop that jump the nozzle to move between the print areas to not hit anything ... originally on ezt 1 is too slow ... here is a small configuration that makes it very fast

(Portuguese)
para quem esta com dificuldades para imprimir pequenos detalhes na ezt t1 principamente com o abs (não sei se isso ocorre com o pla) nas areas com pequenos detalhes aparementemente a extrusão é baixa... mas parece que é um erro do slicer vi sobre isso no reddit é só mudar a forma como o fatiador preenche a top e a bottom layer e um bonus o z hop aquele pulo que o bico da para mover entre as areas de impressão para nao bater em nada... originalmente na ezt 1 é muito lento... aqui tem uma pequena configuração que deixa o mesmo bem rapido

(english)          here some aditional configurations 
(portuguese)    aqui algumas configurações adicionais

Click on image to expand

One thing you need to change is the retraction distance to 6.4 and retraction speed to 25 m/s

unica coisa que voce precisa trocar é a distancia de retração para  6.4 e o retraction speed para  25/ms


Perfect First Layer (English)


I followed the tip of this page here and it worked (https://3dprinterwiki.info/tips/first-layer-settings/) in the layer height area in the cure you go in the advanced option and arrow in the cure first layer height here a little table that I took the page


For a 0.30mm layer height, use 0.27mm Initial Layer Thickness.
For a 0.25mm layer height, use 0.23mm Initial Layer Thickness.
For a 0.20mm layer height, use 0.18mm Initial Layer Thickness.
For a 0.15mm layer height, use 0.14mm Initial Layer Thickness.
for a 0.10mm layer height, use 0.09mm Initial Layer Thickness.


in my case I used the layer height of 0.20 and put it on first 0.18 you need to recalibrate your bed


First Layer perfeita  (portugues)

segui a dica dessa pagina aqui e deu certo (https://3dprinterwiki.info/tips/first-layer-settings/) na area do layer height no cura voce vai na opção avançada e seta no cura first layer height aqui uma tabelinha que peguei na pagina

For a 0.30mm layer height, use 0.27mm Initial Layer Thickness.
For a 0.25mm layer height, use 0.23mm Initial Layer Thickness.
For a 0.20mm layer height, use 0.18mm Initial Layer Thickness.
For a 0.15mm layer height, use 0.14mm Initial Layer Thickness.
for a 0.10mm layer height, use 0.09mm Initial Layer Thickness.

no meu caso usei a layer height de 0.20 e coloquei la na first 0.18 voce vai precisar recalibrar a heatbed

14 julho 2019

structural reinforcement on top of printer ezt t1 ezt3d t1 delta

reforço estrutural na parte superior da impressora ezt t1 ezt3d t1 delta


English
Structural reinforcement at the top of the printer ezt t1 ezt3d delta t1 need bolting nuts for openbuilds profile
need m4 bolts and nuts to hold the top ... but I did not buy a little bit bigger than the piece of acrylic along with the piece printed in 3d
print with a high infill for the part in deforming with the nuts


Portuguese
reforço estrutural na parte superior da impressora ezt t1 ezt3d t1 delta necessita de parafusose porcas para o perfil openbuilds
precisa de parafusos m4 e porcas tambem para segurar a parte superior... mas eu não medi compre um pouco maior que a peça de acrilico junto com a peça impressa em 3d
imprima com um infill alto para a peça na deformar com as porcas

link do thingverse: https://www.thingiverse.com/thing:3747401

ezt t1 - ezt3d delta redutor de backlash (vibração and ruídos) Backlash reducer (vibration and noises)

Redutor de backlash para deltas esse fica um pouco grande usei uma gota de Bonder para segurar num lugar e usei uma mola leve só para apertar levemente agora nao tem mais os ruidos nos braços da delta em movimentos rapidos


english: Backlash reducer for deltas that piece is little bigger than the arms i used a drop of Bonder to hold in place and I used a lightweight spring just to squeeze lightly
now there are no more noises in Delta's arms in fast movements


24 maio 2019

Resolvendo Problemas de união das linhas na primeira camada tronxy x1 (Solving Problems of union of the lines in the first layer)

( Portuguese)
Resolvendo o problema da primeira camada na tronxy x1 algo até bem simples de se resolver, aqui nesse caso voce utiliza um bico de 0.4mm o que voce faz é simplesmente no slicer coloca-lo um pouco menor por ex 0.38 e os problemas de acabam

Voce vai na opção wall line width e coloca 0.38 (caso voce utitlize o bico de 0.4mm se usar um de 5mm voce coloca 0.48 etc)

no cura nas opções avançadas voce clica na engrenagem e procura no campo infill line width
 e coloca os valores citados acima... na imagem como estou usando 0.4 coloquei 0.38

(English)

Solving the problem of the first layer in the x1 tronxy something very simple to solve, here in this case you use nozzle of 0.4mm what you do is simply in the slicer puts it a little smaller by ex 0.38 and the problems end up

You go in the wall line width option and put 0.38 (if you utitlize the nozzle of 0.4mm if you use one of 5mm you place 0.48 etc)


no cure in the advanced options you click on the gear and look in the field infill line width


 and puts the values ​​quoted above ... in the image as I'm using 0.4 nozzle put 0.38


(Portuguese)
E para melhorar o preenchimento nas camadas de cima recomendo essa opção chamada infill overlap faz o infill pegar um pouco da parede e fica uma impressão mais firme (essa opção voce acha na engrenagem nas configurações avançadas)

(English)

And to improve the fill in the upper layers I recommend this option called infill overlap makes the infill pick up a little from the wall and gets a firmer impression (this option you find in the gear in the advanced settings)


(Portuguese)
Outra opção interessante a se ativar é a Z hop que faz o bico se levantar quando vai imprimir em areas separadas mas voce tem que calibrar o seu retraction distance até q não tenha mais fios

(English)
Another interesting option to activate is the Z hop that makes the nozzle get up when it will print in separate areas but you have to calibrate your retraction distance until you have no more wires


28 abril 2019

Driver USB para o modelo antigo impressora Tronxy x1 (usb driver for older model tronxy x1)


(Portuguesse)
Procurei a Internet inteira procurando o bendito driver... até que achei num forum do facebook aparentemente a tronxy x1 tem 2 modelos o antigo e o novo modelo! no meu caso é do modelo antigo que segue abaixo... no futuro mais atualizacoes para a tronxy x1 que é dificil de achar alem dos forums do facebook.

(English)


I searched the entire Internet looking for the blessed driver ... until I found in a facebook forum apparently the tronxy x1 has 2 models the old and the new model! in my case it is the old model that follows below ... in the future more updates for the x1 tronxy that is hard to find besides the forums of facebook


Download Link

https://drive.google.com/file/d/1oU92v9qh7VaXYmP5yy9EjWqpMHvJYvpG/view?usp=sharing

(portuguese)
no repetier coloca nas configuracoes da impressora a porta ''COM'' como auto e o baudrate na faixa dos 11mil


(english)

in the repeater it places the port '' COM '' in the printer settings as auto and the baudrate in the range of 11 thousand

04 março 2019

Reutilizando o monitor fpv do drone jxd 508g


Reaproveitando o monitor do jxd 508g (um dos piores drones que eu ja mexi mas vem com um conjunto de camera  e monitor legal com um limitacao só trabalha na frequencia de banda c 5645, adaptei a freuquencia da minha camera da mjx a c5830 para trabalhar nessa frequencia abaixo uma tabela com as frequencias
Relembrando que o monitor fpv do jxd 508g (possivelmente a do jxd 509g tbm) só acessa a frequencia ch5 5645

english: Reapproveiting the monitor of the jxd 508g (one of the worst drones I've ever tried but comes with a cool camera and monitor with a limitation only works on the c band frequency 5645, I adapted the freuquency of my camera from mjx to c5830 to work on that frequency below a table with the frequencies
Recalling that the fpv monitor of the jxd 508g (possibly the one of the jxd 509g tbm) only accesses the frequency ch5 5645

E logo abaixo umas imagens de como ficou a configurarão de frequencias da câmera da mjx

english: And below below some images of how the frequency settings of the camera of mjx


Tudo conectado na camera da mjx 5830 :)
A bateria interna foi trocada mas penso no futuro usar um carregador usb na porta padrao do android
cortei a case do monitor para caber a aste de uma antena de alto ganho nesse drone

English: Everything connected in the camera of mjx 5830 :)The internal battery has been changed but I think in the future use a usb charger on the standard android port I cut the monitor case to fit the antenna of a high gain antenna on that drone

Bonus 
função extra não documentada no eachine ex2h e possivelmente no mjx bugs b3h que é a função buzzer mas como o drone não tem caixas de som ele usa os proprios motores como speaker

English: Bonus
extra function not documented in eachine ex2h and possibly in mjx b3h bugs which is the buzzer function but as the drone does not have speakers it uses its own engines as speaker


18 janeiro 2019

tutorial radio de drone com bateria recarregável Mjx bugs B3 B3h B6 B8 e achine ex2h

tutorial radio com bateria recarregável (power bank) Mjx bugs B3 B3h B6 B8 e achine ex2h Tutorial rc drone Radio with recharged with power bank for mjx bugs b3 b3h b6 and b8

please turn on captions


20 julho 2018

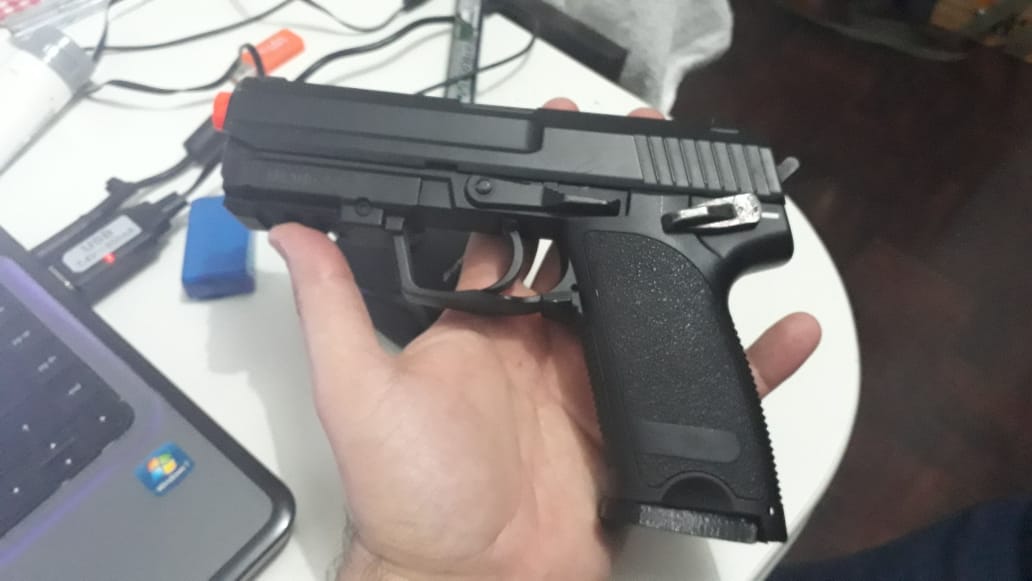
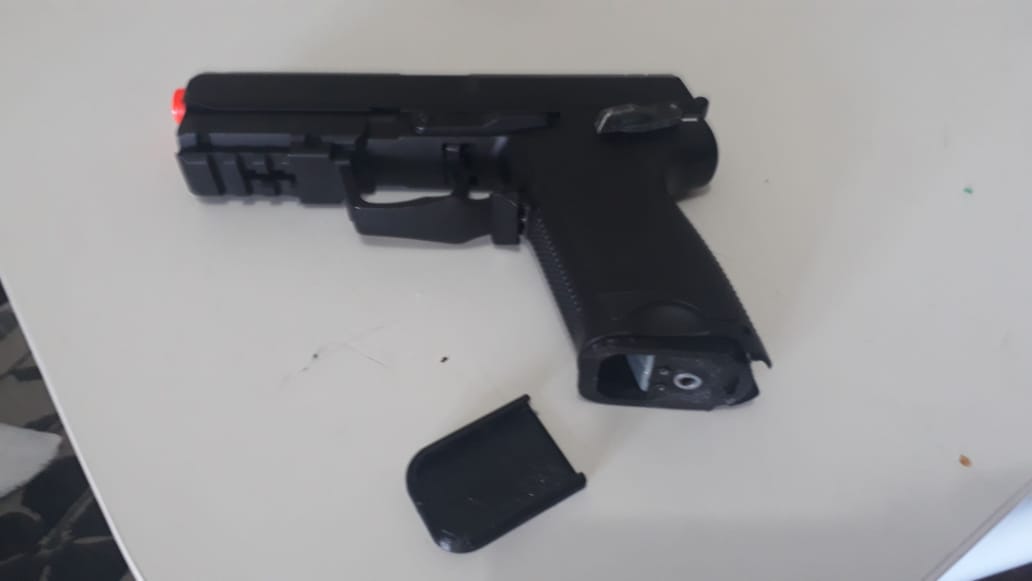
Protetor de magazine para USP AEP Cyma e UMAREX (airsoft electric pistol)

você ja perdeu algum magazine de aep por apertar o mag release sem querer? seus problemas ja acabaram com essa peça impressa em 3d voce tem um encaixe para o fiel e ainda um protetor de magazine com uma tampinha para o mag de aep nao deslizar

impresso em 3d num material flexivel e resistente o PETG

estou iniciando uma produção artesanal de peças de airsoft para venda... A arsenal da Impressão 3d

segue as fotos de um dos meus projetos
https://produto.mercadolivre.com.br/MLB-1070466204-protetor-de-magazine-para-usp-cyma-e-umarex-aep-impresso-3d-_JM


19 julho 2018

Reparo em pistola eletrica airsoft usando imprssão 3d (AEP glock,usp,sig p226, desert eagle e m92f) link do mercado livre

Bom recebi hoje uma pistola de airsoft com um defeito nao atira!

link do produto
https://produto.mercadolivre.com.br/MLB-1102279341-reparo-gatilho-aep-pistola-airsoft-glocke-outras-airsoft3d-_JM

mas vamos falar da pistola! é uma pistola mto bonita! seu corpo quase completamente em metal! desconfio que seja zinco... com otimos acabamentos! em comparação com uma 1911 real ela é mais gordinha! entao em certos coldres padrao 1911 ela nao vai caber!!

 
Arma AEP muito robusta da marca cyma tem fps acima da media... cronando 220 fps
bom porque estou postando a respeito dela aqui? pois bem o dono desta arma emprestou para pessoas leigas para a manusearem e acabaram estragando a arma... uma dica importante para quem tem aep de airsoft NUNCA EMPRESTAR as pessoas que nao tem cuidado... principalmente novatos... nesse caso as pessoas forçaram o gatilho com a arma travada o que acabou resultando na quebra de uma peça de metal mto fragil do gatilho


tentei colar e nao deu certo hehehe


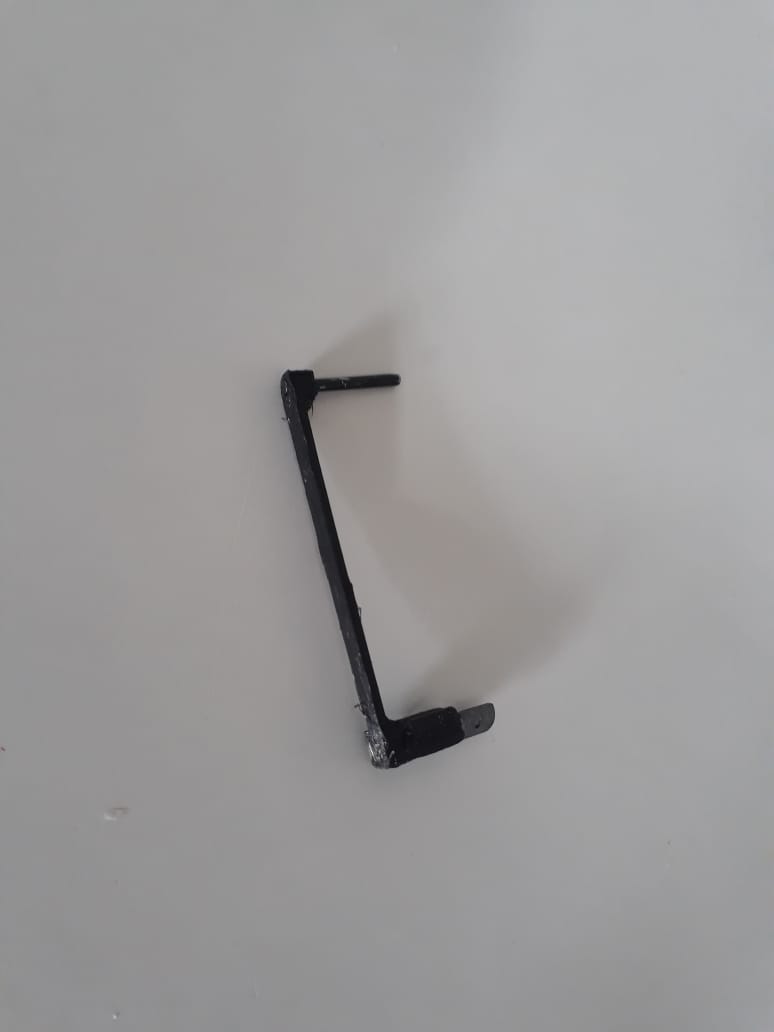
consegui um arquivo em impressão 3d para arrumar essa peça serve para a GLOCK eletrica de airsoft, 1911, USP, SIG P226, DESERT EAGLE, e a nova pistola da CYMA a M92F (Beretta ou M9)

a nova peça é bem flexivel feita em plastico abs...


 e a pistola esta funcionando 100% novamente!

a quem interessar consigo a peça com um preço muito mais barato que o site da qg airsoft... mas para manusear essa peça requer alguns cuidados assim como todas as impressões 3d


Estou vendendo pelo mercado livre agora depois de muitos pedidos o material de impressão é o petg mto resistente!

link para o anuncio
https://produto.mercadolivre.com.br/MLB-1073313675-alavanca-gatilho-aep-pistola-eletrica-airsoft-cyma-umarex-3d-_JM

mais imagens da peça em si